Guide to Bike Chain Repair and Maintenance
 Guide to Bike Chain Repair and Maintenance
 Guide to Bike Chain Repair and Maintenance
Biking is not only an excellent form of exercise but also a convenient mode of transportation. However, like any other machine, bikes require regular maintenance to function optimally. One of the most important yet overlooked components of a bike is the chain.
A bike chain connects the pedals to the rear wheel, and a rusty, worn-out chain can significantly impact the bike’s efficiency. Here is a guide to help you understand how to maintain and repair your bike chain.
Clean the Chain
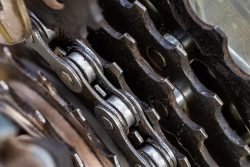
Before performing any maintenance on your bike chain, it is essential to clean it thoroughly. Dirt and grime can clog the chain, damage the links and derailleur, and even wear down your gears. Use a bike cleaning product or a brush and soap to scrub the chain, and then rinse it with water to remove all the soapy residue. Allow the chain to dry completely before lubricating it.
Inspect for Damage
After cleaning your chain, examine each link for damage. If any parts of the chain appear broken, bent, or misaligned, you will need to replace it. If the chain is rusted and cannot be cleaned, you may also need to acquire a new one. Ignoring broken or damaged chain links can substantially affect your bike’s functionality and safety.
Lubricate the Chain
The next step is to add lubricant to the chain. This helps reduce friction and prolongs the life of the chain. Use bicycle-specific lube and apply it sparingly, making sure to cover the entire chain. Wipe off any excess lubricant to prevent dirt buildup.
Adjust Tension
If your chain is too loose or too tight, it can result in slipping gears or decrease your bike’s efficiency. To check for the proper chain tension, lift the bike off the ground, and spin the pedals backward. If the chain does not sag or bind, it is appropriately tightened.
If the chain is too tight, loosen the rear wheel, move it backward using the tensioners and tighten the bolts. If the chain is too loose, pull the wheel away from the frame, adjust the tensioners, and tighten the bolts. Keep in mind that the chain’s tension will change after biking for an extended period. Therefore, be sure to check the tension regularly.
Replace the Chain
Replacing a bike chain can be a time-consuming process, but it is essential for your bike’s performance and safety. It is recommended to replace your chain every 1,500 to 2,000 miles or when the chain has stretched by more than 1/8 of an inch.
To replace the chain, use a chain tool to remove the broken or damaged links and then install a new chain. Connect the new chain by linking it onto the chainring, threading it through the derailleur and rear wheel cog, and connecting the ends using a chain tool. Make sure to adjust the chain tension after replacing the chain.
Prevent Chain Wear
Regular maintenance can prevent chain wear and extend the life of your bike chain. Here are some tips to help you keep your chain in optimal condition:
– Wipe down the chain after each ride to remove any dirt and debris.
– Keep your bike chain lubricated to reduce friction and wear.
– Avoid using a high-pressure hose to clean your bike as it can force water into the chain and promote rust.
– Avoid cross-chaining, which is using the smallest front chainring and the smallest rear cog, or the largest front chainring and the largest rear cog, as it puts extra stress on the chain.
– Avoid shifting under heavy load, as it can damage the chain.
Final Thoughts
Proper maintenance and repair of your bike chain are crucial to ensuring your bike’s efficiency, performance, and safety. Regularly cleaning, inspecting, and lubricating your chain can prevent damage and extend its lifespan. If the chain is broken or damaged, it is essential to replace it. Performing these basic maintenance tasks can help you avoid costly repairs and keep your bike running smoothly for years to come.
Categorised in: Bike Chain